Maps
Map creation (i.e. converting an itinerary to a static image) is the most prominent purpose of Flightmap. As maps are static images, you can set a wealth of options in advance.
The fonts “Arial” and “Tahoma” need to be installed on your computer. Both are distributed with Windows and installed by default.
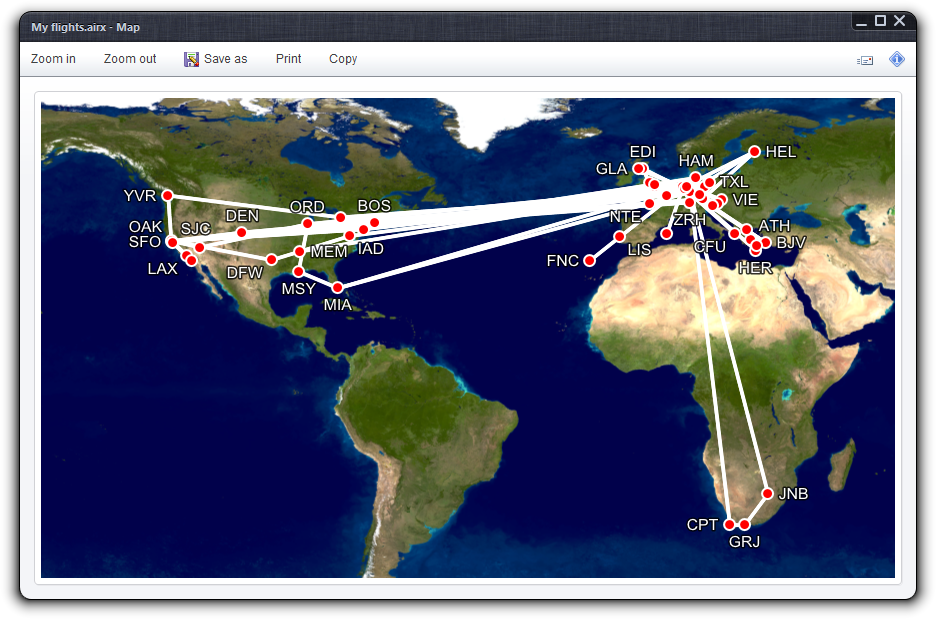
Map window
The sidebar command creates a new map, and displays the map image in a new window. The map window allows you to copy the map to the Windows clipboard, export it in various image formats, and print it. You can zoom into the image using the mouse wheel.
Map settings
There are various settings for maps created by Flightmap, distributed among four separate dialog tabs.
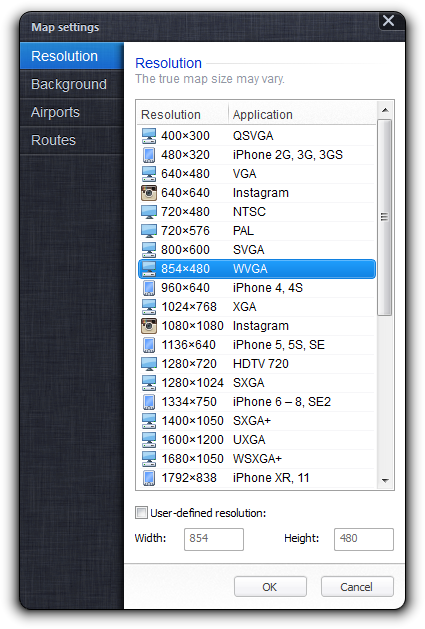
Resolution
The first tab is used to set the map resolution. It contains a list with lots of predefined resolutions, but you can enter a custom width and height for the image at the bottom. Please note that Flightmap does its best to create a map with the resolution you've selected, but the image will be resized an deviate from the set resolution whenever deemed neccessary to fit all flights.
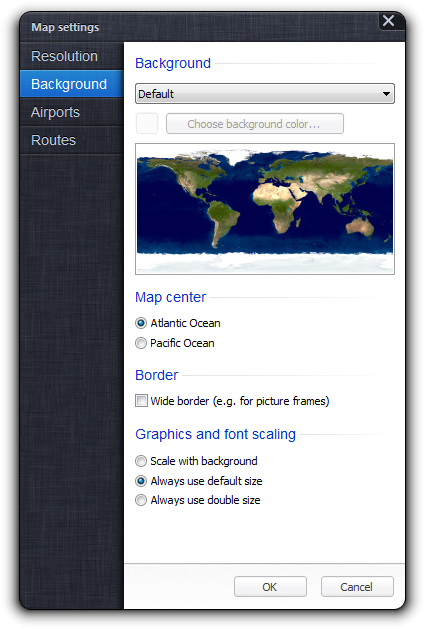
Background
Flightmap offers various background images: the default “Blue Marble” map, “City Lights” and an abstract gray/white map. You can also select a single solid color as background, e.g. for travel catalogs, blogs etc. where a background image is too much clutter. The “Choose background color” button becomes enabled when “Solid color” is selected.
Another important setting regarding the map background is centering. Flightmap fits all flights into the image, and clips the map accordingly. A problem arises when lots of flights cross the Pacific Ocean: to make the map clip in a useful way, “Pacific Ocean” should be used—otherwise Flightmap will use the complete background image.
Below that is setting which enables a “Wide border” around maps, something very useful for printing and framing map pictures. The extra wide border makes sure no frame will overlap any airport labels or routes.
The last setting is about font size: Flightmap will scale down fonts a bit when the map is zoomed out, but you can fix the font size at its default size, or even double that for extra large text.
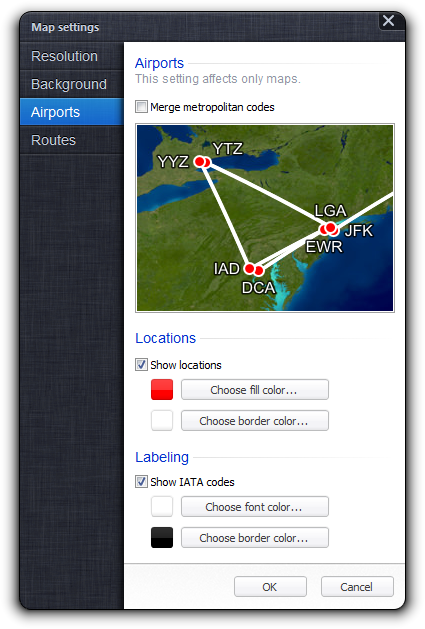
Airports
The third tab is all about airport locations. At the top you'll find the usual checkbox to merge nearby airports into a single IATA metropolitan code (e.g. EWR, JFK and LGA become NYC).
Below you can enable location dots, and choose both fill and border colors. These settings repeat for airport labels (e.g. JFK).
Routes
You can choose to display or omit all flight routes. If you enable the flight routes, you can configure them in various ways. Flightmap allows you to either use the color assigned to flights, or force the default color on all legs.
The setting “Straight lines” replaces the standard Great Circle routes with straight lines between the airports, “Draw arrows” enables arrows indicating the direction of each leg, and “Draw frequent routes wider” and “Draw frequent routes more opaque” choose the stroke width and opacity with regard to the number of the particular route has been travelled.
The “Annotations” section allows you to enable various information to be displayed above the actual flight routes, such as “Distance”, average “Flight time”, “Flight count”, “Carrier” and “Equipment”. Annotations only appear when there's no overlap with other items on the map, the information is in the itinerary, and is non-conflicting (i.e. different data for different flights on the same route) for “Carrier” and “Equipment”.
Screenshots